
I've watched drivers get blamed for accidents they didn't cause. I've seen owner-operators lose disputes over cargo damage, parking lot scrapes, and four-wheelers who changed their story once the lawyers showed up. Every single one of those situations gets simpler with footage. A dash cam doesn't lie, doesn't forget, and doesn't need a lawyer. If you're running OTR in a Class 8 truck and you don't have one mounted yet, this guide will get you squared away in about an hour with a basic toolkit and no drill required.
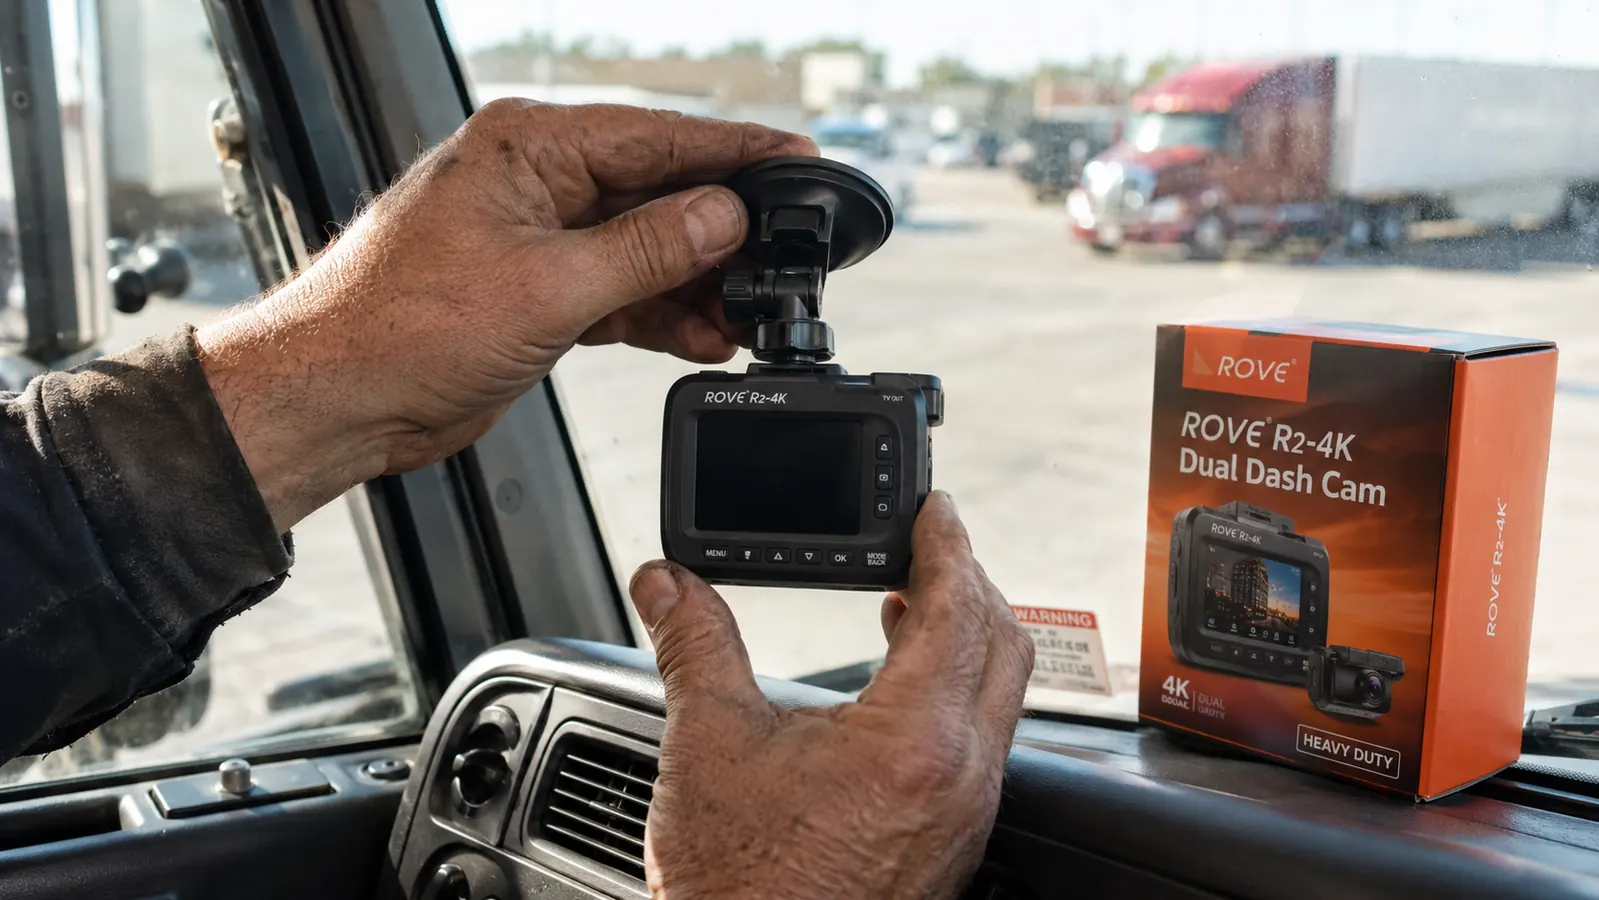
The camera I'm walking you through here is the ROVE R2-4K, a dual-channel unit built specifically for trucks and commercial vehicles. It shoots 4K up front and 1080p out the rear, includes a free 128GB SD card, has GPS built in so the footage logs your speed and location, and runs on 5G WiFi so you can pull clips to your phone without touching the camera. It's the one I use, and it's the one I'd tell a buddy to buy. That said, the install steps below apply to pretty much any dash cam with a suction or adhesive mount.
Don't wait for the close call. The ROVE R2-4K is the camera I trust in my own rig.
Dual 4K front and rear, GPS logging, free 128GB card included. Ships to most truck stops and terminals in two days.
Amazon Check Today's Price on Amazon →What You Need Before You Start
Gather these before you climb in the cab: the dash cam and all its cables (the ROVE ships with a long enough USB-C power cable to reach a cigarette lighter socket), a panel pry tool or a flathead wrapped in tape so you don't gouge the trim, a microfiber cloth and some isopropyl alcohol (70% or better), the SD card formatted for the camera, and a small flashlight if you plan to route cables through the headliner or behind the A-pillar trim. Optional but useful: a fuse tap kit if you want a hardwire install instead of plugging into the cigarette lighter.
You do not need a drill. You do not need to run any new wire through the firewall. You do not need to cut into anything. The whole install is reversible. If you're a company driver and your carrier has rules about cab modifications, this will pass any reasonable inspection because nothing is permanent.
Step 1: Clean the Windshield Mounting Surface
The mount lives or dies on surface prep. Wipe down the area where you're going to stick or suction the mount using isopropyl alcohol on a microfiber cloth. On a semi, you want the camera on the driver's side of center, tucked up near the top of the windshield where it sits behind the rearview mirror and stays out of your sightline. Some drivers go dead center; I go about two inches left of center so the rear camera on the other end of the cable has a clear view of the sleeper window or rear cab glass.
Let the alcohol dry completely. Sixty seconds, no rushing. If you press a suction cup onto a wet or dirty surface it will fail, usually at the worst possible moment, and a falling dash cam on the highway is not something you want to deal with. The ROVE R2-4K uses a suction cup mount. Press it firmly, rotate the locking arm to secure it, then give it a firm pull to confirm it's locked. If it slides at all, clean the spot again.
Step 2: Angle the Camera Correctly
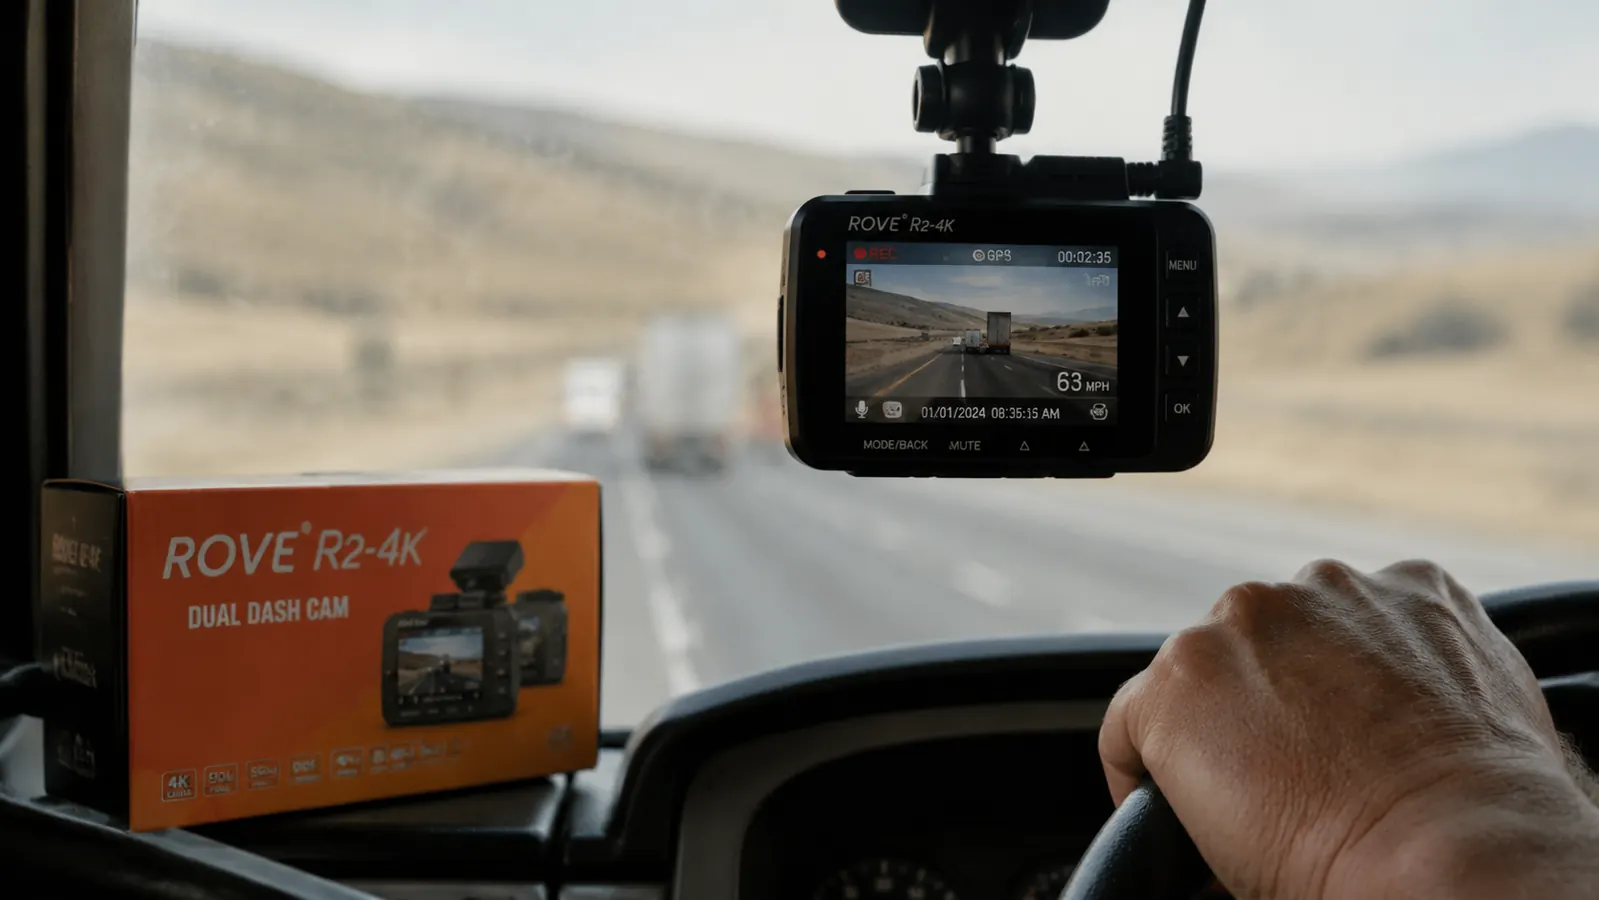
A semi truck sits high off the ground. That changes the angle you need compared to a car install. If you angle the camera the same way you would in a pickup, you'll get too much sky and not enough road. On a Class 8, tilt the camera down more than you think you need. A good target: the horizon should land in roughly the top third of the frame, with the hood edge just visible at the bottom. That captures license plates on vehicles in front of you, road debris, and any merge incidents at a useful angle.
For the rear camera, if your unit is a dual-channel setup like the ROVE R2-4K, run the rear camera cable to a back window on the cab or route it back through the sleeper to a rear-facing position. The rear lens is wide enough to cover the area directly behind the sleeper on most mounts. Angle it so you're seeing the trailer doors and the lane behind you. A lot of the bump-and-run incidents truckers deal with happen at the rear of the trailer, so even a basic view back there is better than nothing.
Step 3: Route the Cable Down the A-Pillar
This is the step that separates a clean install from a wire hanging across your cab. On most semi trucks, the A-pillar trim panel is a plastic piece running from the top corner of the windshield down to the dash. It usually snaps off without any screws if you pull firmly and evenly from the top. Use your panel pry tool if it's stubborn. Once it's loose, you have a gap between the pillar and the headliner where you can tuck the USB power cable out of sight.
Start at the top, near the mount. Push the cable into the gap between the headliner and the A-pillar, then work it downward along the pillar, pressing it into the trim channel as you go. Some guys use a thin strip of foam tape to hold the cable against the trim before snapping the panel back on. That's a good idea on rough roads because it stops the cable from rattling. Once the cable is routed, snap the A-pillar trim back into place. The cable should be completely hidden from the mount point all the way down to dash level.
From the bottom of the A-pillar, you have about twelve to eighteen inches of cable left to reach either the cigarette lighter socket or your fuse box, depending on which power method you're using.

Step 4: Choose Your Power Source (Cigarette Lighter vs Hardwire)
You have two options here, and they matter differently depending on what you need from the camera.
The cigarette lighter plug is fast and simple. You plug it in, the camera turns on when the ignition does, and it shuts off when the key comes out. For most drivers running OTR, this is plenty. The ROVE R2-4K comes with a long enough cable to reach most semi dash power outlets without the wire hanging in the way if you've done the A-pillar routing. Downside: if you're parked and something happens in the lot, the camera is off.
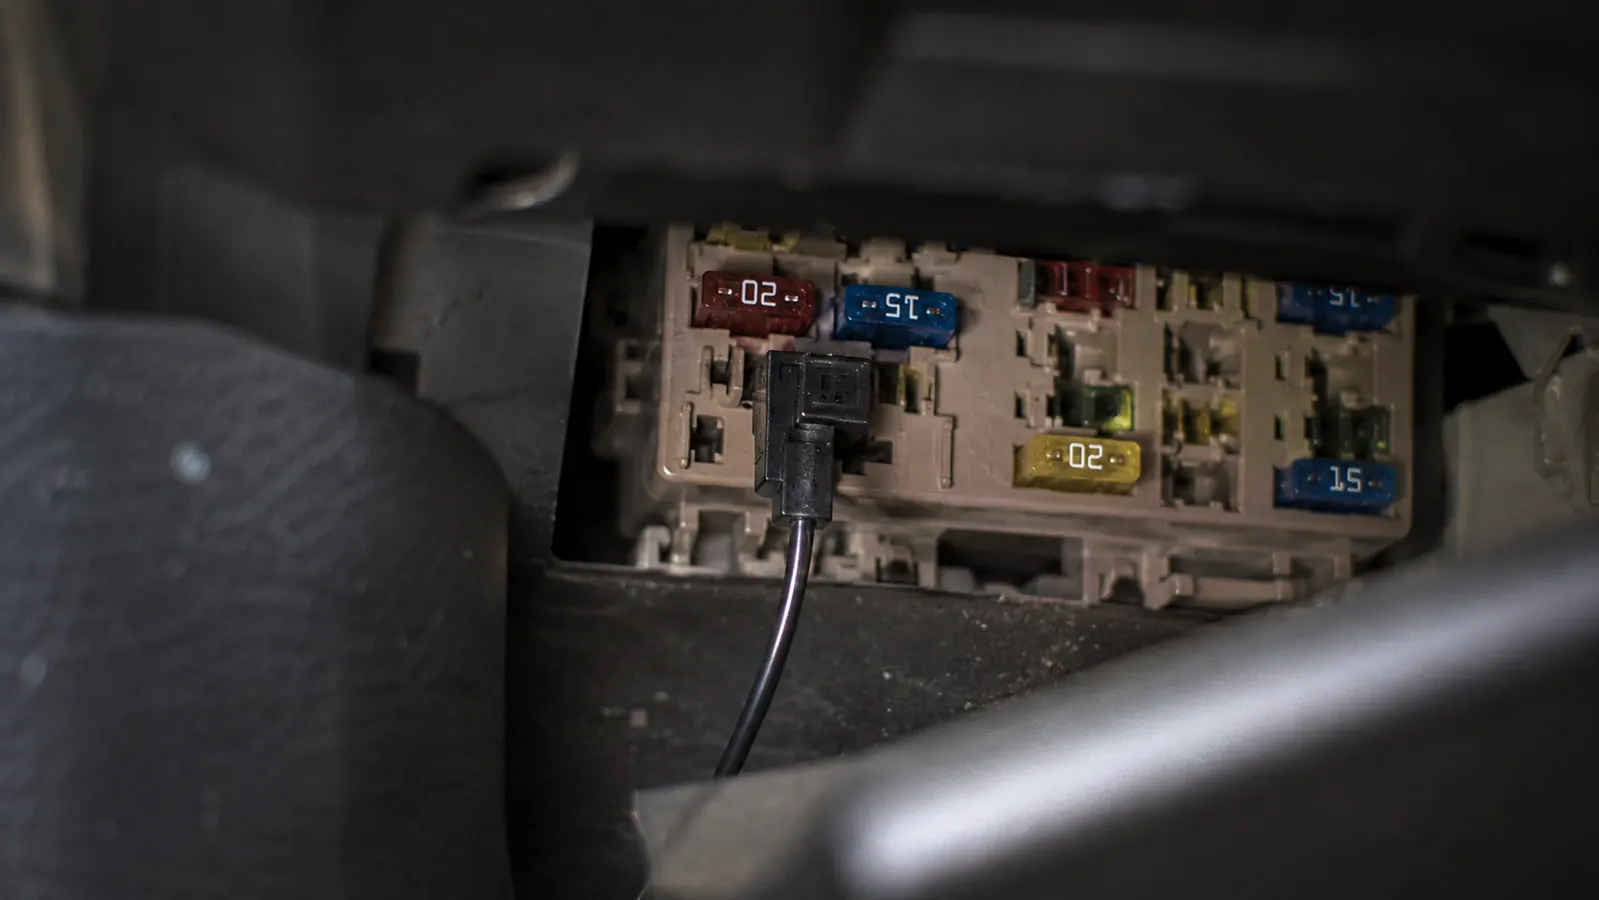
Hardwiring takes another thirty minutes but gives you parking mode. You'll need a fuse tap kit, a short section of add-a-fuse wire, and basic wire strippers. Open the fuse panel under the dash, identify a fuse that only gets power when the ignition is on (use a test light), and tap into it for the switched power lead. Run a second lead to a constant-power fuse slot for parking mode. The ROVE hardwire kit has both leads labeled, so you're not guessing which wire goes where. Once it's connected, route the thin hardwire cable up the same path as your data cable and connect it to the camera's power input. The camera will now run in a low-power parking monitor mode when the truck is off, recording only when it detects motion or impact.
For owner-operators parked at unsecured lots or shipper docks, parking mode is worth the extra work. For company drivers who park at monitored yards, the cigarette lighter install is fine.
Step 5: Format the SD Card and Configure Loop Recording
Before you do anything else, format the SD card inside the camera itself, not on your laptop. The ROVE R2-4K ships with a 128GB card already in the box, which is enough for roughly ten to twelve hours of continuous 4K footage before it starts looping. Format it in the camera by going into the settings menu, finding the storage option, and selecting format. This wipes the card clean and sets it up for the camera's file system. Using a card formatted on a computer sometimes causes recording errors or missed clips.
Set the loop recording interval. Most dash cams default to three-minute clips, and I'd leave it there. Three-minute files are small enough that the camera can write them quickly, and if you need footage from a specific incident, three-minute clips are easy to scroll through. The camera deletes the oldest clips automatically when the card fills up, so you don't have to manage the storage yourself.
Turn on GPS logging if the camera supports it. The ROVE R2-4K has GPS built in and it works well. Your speed, location, and route get embedded in the footage metadata. That data is worth a lot in an insurance dispute. An adjuster looking at footage with a timestamp, GPS coordinates, and logged speed has everything they need to clear you if you weren't at fault.
While you're in the settings, set the time zone and date correctly. Footage with the wrong timestamp is still useful, but correct timestamps are better. If the camera has a WiFi app, connect it now and confirm that you can pull a clip to your phone. On the ROVE, the app connects over 5G WiFi and the video transfer is fast enough to pull a one-minute clip in about forty-five seconds. Useful to know before you actually need it.
What Else Helps
Once the dash cam is running, there are a couple of habits that keep it useful. Every few weeks, check that the suction mount is still firm and that the angle hasn't drifted. Truck vibration is hard on mounts over time. On rough stretches of road, a suction cup that seemed locked can work itself loose. A quick palm-press every week or two costs you nothing.
Keep the windshield clean in the camera's field of view. A greasy or bug-covered windshield turns a 4K dash cam into a blurry mess. Clean from the inside before you pull out. Some drivers put a small dedicated squeegee in the cab door pocket for this. That's not a bad idea.
If you ever get flagged in an incident and need the footage, do not let the camera record over it. Pull the SD card immediately and copy the clips to a thumb drive or your phone. Loop recording will eventually overwrite the files you need if you let it keep running. The camera doesn't know what's important. You do.
For more on why carrying footage from every run matters, read the full breakdown at the ROVE R2-4K review for long-term OTR use, or check out the reasons every owner-operator needs a dash cam before the next load. Between the install and the context for why it matters, you've got everything you need to make a decision.
The camera doesn't care what the other driver says happened. It only shows what actually happened. That's the whole point.
Ready to mount it? The ROVE R2-4K installs in under an hour and includes everything you need.
Free 128GB card in the box. GPS built in. Parking mode works with the optional hardwire kit. No subscription, no monthly fee.
Amazon Check Today's Price on Amazon →